Wednesday, June 26, 2013

Front Porch and Coffee Table

One of the cool things we liked about the house when we looked at it was the spiraling staircase leading up the front door.  As you can see, it was covered with ivy and leaves, and overall an adventurous hazard for anyone visiting us.

(old porch pic here)

The ivy looked kinda cool and helped soften the brick staircase.  But, we later learned that clumps of ivy like that are breeding grounds for Brown Recluse spiders (or at least that's what the pest control lady told us).  So, it had to go.  As did the tree right in front of it.

Another fun fact is that the bottom of the post holding up the roof over the front porch was rotted out.  I'm pretty sure that the only thing holding it up was how the railing was connected to the post and the house. In the course of painting the house (which, in itself is a whole other story), the painters replaced the post and supports.  But when they did, they used matching wood - a 4x6 cypress post.  And after seeing it, I called an audible and told them not to pain the post - I was going to stain it.

I also re-did the railing portion and added some metal balusters.  The finish on the balusters matches the new gutters we put up.  See?  The final plan is starting to really take shape. I may come back and add some wood around the base of the post to give it a little more detail, but also as a "sacrificial" wood.  If the post rotted once, it may do it again, so adding the wood at the bottom (and some silicone) should help improve the post's longevity.  Or so the theory goes...


Another bonus to replacing all that wood is I now had a pile of old, aged wood I could re-purpose into something else.  The idea I came up with was to use the reclaimed timber (there's that phrase again) it for a coffee table for the back porch.  


My original idea was to strip all the paint and stain the wood.  However, the stripper I got wasn't working so I took the sander to it.  And as I was sanding it down, it started too look pretty cool with the white and blue showing through so I called another audible and decided to leave the top like that.  (The legs were never painted white so only blue on those.)  It turned out pretty well - I just need to add some poly to the top and it will be done.

Thursday, June 13, 2013

Half Bath

Downstairs, just off the laundry room, we have a half bath.  Toilet.  Sink.  And wallpaper.  (Notice the warnings on the plumbing fixtures that they had been winterized - one of the fun things about looking at a foreclosure.)


The room is pretty small and cramped.  The wallpaper came off pretty easily.  As did the toilet and the vanity.  I decided to replace the vanity with a pedestal sink to open the room up some.  The mirror was up in the kids' bath - I painted the frame and hung it up in here.  You can't see it in the picture, but I also put in a pendent light as an added detail.


The toilet was easy, or at least so I remembered until it became the first repair of my own renovations.  I was in the crawlspace one day and noticed some water under the bathroom.  I immediately went to investigate and saw that the toilet had been leaking.  Awesome.  Wax seal baby.  I took the toilet off and discovered the problem.  When we tiled the kitchen/laundry room/bathroom I had to add an extension to the flange so the seal would fit.  But I had forgot to secure it, so water was slipping out when the toilet flushed.  I got the drill and some screws out to remedy the situation.  And here's the snag.  I soon found out why there was a missing drill bit in my drill bit case.  The builder had put a cast iron flange here.  The only place in the entire house, on top of PVC pipe.  Who does that?  Now, with two dulled drill bits, I had to find a new answer.  I ended up removing some other screws and putting them through the whole thing.  Some plumber's putty and a new wax seal later, and the toilet is fixed.  Another lesson in do it right the first time.

Re-Tiered Deck

Background:
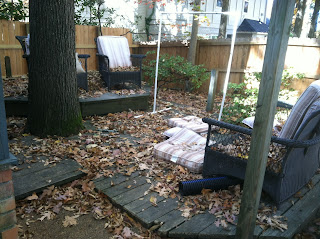
We have a 10x20 deck in the back of the house.  It's off the porch and in a full-shade nook of the backyard.  We haven't really used that space for much - because the deck was originally built for a hot tub and was designed to be two-tiers.  I'm not sure why they did two levels, because the upper level (where the hot tub sat) basically puts you at a spot looking into the neighbors' yard.  It doesn't exactly make for private hot tubbing.  There was also a porch swing thing that looked at the hot tub.  Guess they really liked that hot tub.


This pic is actually after the fence was replaced.  The fence was a story in itself: they built a wood fence on chain-link posts.  Needless to say, it wasn't too sturdy and the dog had quickly figured that out.  He was constantly checking the structural integrity of the fence.  Remember that scene in Jurassic Park where the velociraptors were checking the electric fence in patterns for signs of weakness?  Like that.  I had to rip that out and put in a real fence.  You can't tell from the picture, but I stuck to my 3 post hole limit.  I have a personal cutoff for digging post holes by hand and it stops at 3.  Anything more than that and I'm renting a post hole auger.  I also have an unconscious heat threshold: I apparently always pick the hottest day of the year to dig 2 foot deep post holes through the Memphis clay.  Either that, or trench-digging.  Those are the only activities you can do when the heat index is 120.  Why?  That's something I ask myself repeatedly while I do it.  The different heights are because our backyard has a one foot retaining wall that levels/raises this area up - the neighbors' yard is the natural slope.

Problem(s):
We weren't really using this area because, as you can see, it made for weird, non-private seating.  Plus, I wasn't really sure what I wanted to do here.  The deck is pretty old and is basically on the ground so I had no clue what condition the bones (joists, etc.) were in.  Plus, it's built around a huge tree.  I considered ripping it out and doing a pea gravel area, or just completely rebuilding the entire deck.  The other big issue is that all the rainwater from the backyard and patio comes right to this area and flows around the deck to the front of the house.  The decking looked way past its prime too so I may have to replace it as well.

The Plan
I settled on just removing the upper deck and making it all one level, reusing the decking where I could.  I'll embrace the "wildness" of the corner and try to make it a shout-out to the Smokies - give it a treehouse/woods/mountain feel to the area.

The Process
It took longer than I expected, of course. :)  However, I ended up reusing all the decking I pulled off and didn't have to buy any decking, so it all matches now and looks like it's always been there.  (Doing this also gives you the out of saying "I don't why they did it that way" if things don't turn out as well as planned.)  Once I pressure washed the decking it actually looked pretty cool - definitely looks aged and "naturally" stained.  It gives it more of a feeling of permanence and like you're in the woods.  Plus, now I can call it reclaimed timbers and sound ultra-hip.  I did have to buy one 2x8 and some hangers in order to make the new section work.  Also, I decided to go with nails on the decking to match the old side.  After 4 pounds of nails, my wrist still hurts.  The pic below is before I hauled all the remaining wood to the street.  But, you can see how the azaleas are growing over the deck, as is the struggling dogwood in the back.  I just need to plant some stuff around it to complete the job.  Plus, I need to figure out some drainage to go around it.  THAT's the next big project.  But it's not nearly hot enough to dig trenches yet (see above) so I'll probably post some old projects in the mean time.


Back in Business

Ok, so our third was born and that kinda put a crimp in the blogging.  I'm back now and I'll get some more projects on here.